The Ultimate Peanut Butter Cookie Revelation: Unleashing Crispy-Chewy Perfection with a Potato Masher
Few desserts evoke such warm nostalgia as the classic peanut butter cookie. A cherished staple in lunchboxes and cookie jars for generations, its rich, nutty flavor and satisfying chewiness hold a special place in our hearts. While the timeless appeal of a homemade
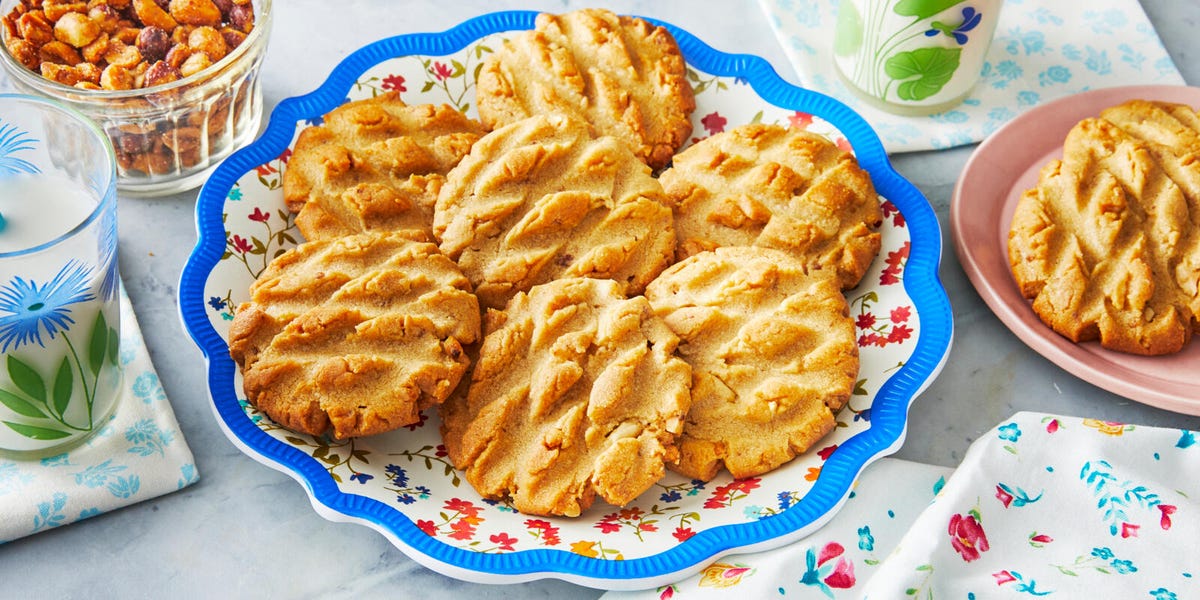
peanut butter cookies recipe remains unmatched, we're here to reveal a simple yet brilliant upgrade that will elevate your baking game: the potato masher secret. Forget the humble fork; a potato masher creates a unique, raised crisscross pattern that not only makes these cookies incredibly cute but also guarantees an irresistible crisp outer layer contrasting beautifully with a soft, chewy center. Get ready to rediscover your favorite treat, perfected.
The Potato Masher Secret: Unveiling Crispy Edges and Chewy Centers
For decades, the standard for a classic peanut butter cookie has been the distinctive crosshatch pattern pressed into the dough with a fork. This isn't merely for aesthetics; it serves a crucial functional purpose. Peanut butter cookie dough is notoriously dense, and those indentations provide the perfect surface for the dough to spread evenly during baking, ensuring a consistent texture and thorough cooking throughout. Without them, your cookies might remain thick and undercooked in the center.
Now, imagine taking that functional necessity and turning it into an opportunity for enhanced texture and visual appeal. That's where the potato masher comes in. Instead of flat lines, the potato masher's grid creates a unique, raised crisscross pattern. This innovative technique has several advantages:
* **Superior Texture:** The raised grid means more surface area is exposed to the oven's heat, leading to a gloriously crisp exterior that shatters delicately with each bite. Beneath that delightful crunch, the cookie remains wonderfully soft and chewy, offering a dynamic textural experience that a simple fork can't quite achieve.
* **Enhanced Visual Appeal:** Let's be honest, these cookies are *cute*. The pronounced, uniform pattern makes them stand out, looking utterly professional and incredibly inviting. They're perfect for bake sales, gifting, or simply impressing your family.
* **Even Spreading and Baking:** Like the fork method, the masher ensures the dense dough spreads appropriately, allowing for uniform baking and preventing those undesirable raw centers.
If you don't happen to have a potato masher, fear not! You can still achieve a similar effect with the raised, textured side of a meat mallet, or, of course, revert to the traditional fork method. But once you try the potato masher, you might never go back. It's a game-changer for any
peanut butter cookies recipe enthusiast.
Crafting the Perfect Peanut Butter Cookie: Ingredient Insights and Common Pitfalls
The foundation of any great cookie lies in its ingredients. While the potato masher technique elevates the texture, getting the base right is paramount. Here’s a deep dive into the components that make this
peanut butter cookies recipe truly shine:
* **The Right Peanut Butter is Key:** This is perhaps the most critical distinction. For perfectly chewy cookies that don't crumble, **always opt for regular, creamy peanut butter**. Natural peanut butter, while delicious on toast, tends to be drier and less emulsified, leading to crumbly cookies. Similarly, crunchy peanut butter, due to its thickness and added nuts, can also result in a drier, more fragile cookie. The smooth consistency and balanced fat content of regular creamy peanut butter are essential for that signature soft and chewy texture.
* **Avoid Nut Butter Substitutes:** While experimenting in the kitchen is fun, substituting other nut butters like almond butter or cashew butter for peanut butter in *this specific recipe* is not recommended. Different nut butters have varying consistencies, fat contents, and protein structures that will alter the cookie's texture and spread dramatically. Stick to the classic for guaranteed success.
* **The Sweetener Blend:** Our recipe calls for a thoughtful combination of light brown sugar and granulated sugar, often complemented by a touch of honey. Brown sugar adds moisture and a deeper, molasses-rich flavor, contributing to the cookie's chewiness. Granulated sugar provides structure and crispness, while honey further enhances the moisture and adds a subtle floral note, ensuring a wonderfully soft, melt-in-your-mouth texture.
* **Butter and Eggs:** Ensure your butter is softened to room temperature for optimal creaming with the sugars. This creates an airy base that traps air, contributing to the cookie's lightness. A large egg binds the ingredients and adds richness.
* **Flour, Leavening, and Salt:** All-purpose flour provides the structure, baking soda ensures a proper rise and tender crumb, and kosher salt balances the sweetness, enhancing all the flavors.
* **Vanilla Extract:** Don't underestimate the power of good vanilla extract. It rounds out the flavors and adds a warm, inviting aroma.
* **Optional Enhancements:** For an extra layer of flavor and texture, consider folding in finely chopped honey roasted peanuts or sprinkling flaky sea salt on top before baking. The salty crunch perfectly complements the sweet peanut butter flavor.
To truly master your cookie craft and avoid common pitfalls like overly hard or crumbly cookies, delve deeper into ingredient science and troubleshooting tips. For more insights on perfecting your batch and preventing baking mishaps, read our comprehensive guide:
Bake Perfect PB Cookies: Stop Crumbly & Hard Bites with Our Tips.
Baking Brilliance: Achieving That Melt-in-Your-Mouth Texture
Even with the perfect dough, success hinges on proper baking. Peanut butter cookies, much like oatmeal or chocolate chip cookies, require a watchful eye to achieve that desired balance of crispness and chewiness.
* **Don't Overbake!** This is the golden rule for chewy cookies. Over-baking is the quickest way to turn a potentially perfect cookie into a hard, crumbly disappointment. Keep a close watch on your oven. You're looking for the edges of the cookies to just *begin* to turn golden brown, typically after about 10 minutes, depending on your oven. The centers and tops may not appear fully browned, and that’s perfectly fine – in fact, it’s ideal!
* **The Magic of Residual Heat:** When you pull the cookies out of the oven, they will still be incredibly soft and seem slightly underdone in the middle. This is precisely what you want! The residual heat within the cookies will continue to cook them as they cool on the baking sheet, allowing them to firm up while retaining their moisture and chewiness.
* **Cooling is Crucial:** Resist the urge to transfer them immediately. Let the cookies rest on the hot baking sheet for 5-10 minutes. This critical resting period allows them to set up, making them sturdy enough to transfer to a wire rack without breaking. Once on the rack, allow them to cool completely to achieve their final texture. Patience here will be rewarded with a truly melt-in-your-mouth cookie.
Make-Ahead & Storage Secrets for Peanut Butter Cookie Bliss
One of the many joys of this classic
peanut butter cookies recipe is its versatility for make-ahead preparation and excellent storage potential. This means you can always have delicious, freshly baked cookies ready to go, whether for an unexpected guest or a sudden craving.
* **Freezing Cookie Dough:** You can absolutely prepare the dough ahead of time and freeze it. Simply roll the dough into individual balls (as if you were ready to bake them), place them in a single layer on a parchment-lined baking sheet, and freeze until solid. Once frozen, transfer the dough balls to a resealable freezer bag or an airtight container. They'll keep beautifully in the freezer for up to three months.
* **Baking from Frozen:** When you're ready to bake, there's no need to fully thaw the dough. Simply let the frozen dough balls sit at room temperature for about 15-20 minutes until they're just soft enough to flatten with your potato masher (or fork). Then, place them on a baking sheet and bake according to the recipe directions, adding a minute or two to the baking time if needed. This method yields wonderfully fresh-from-the-oven cookies with minimal fuss. For more expert tips on preparing cookies in advance, explore our guide on
The Easiest Make-Ahead Peanut Butter Cookie Recipe for Any Occasion.
* **Storing Baked Cookies:** Once baked and completely cooled, these cookies store exceptionally well. Keep them in an airtight container at room temperature for up to one week. To extend their freshness even further, you can freeze baked cookies in an airtight container for up to three months. Thaw them at room temperature, or for a warm treat, gently reheat them in a microwave for a few seconds.
Conclusion
The simple act of baking peanut butter cookies is a comforting tradition, but with the subtle genius of a potato masher, you can transform a beloved classic into an even more exceptional treat. This technique, combined with careful ingredient selection and precise baking, guarantees a cookie that boasts a delightfully crisp exterior, an irresistibly chewy interior, and an adorable, unique appearance. Whether you're a seasoned baker or just starting your culinary journey, this upgraded
peanut butter cookies recipe promises a truly satisfying experience. So, grab your masher, mix up a batch, and prepare to fall in love all over again with the ultimate crispy-chewy peanut butter cookie.